Docker
There are two ways to install NBomber Studio: as a hosted Docker container (the simplest path, covered on this page) or in your own Kubernetes cluster.
- NBomber Studio is provided as a Docker image and requires a Postgres database (with the TimescaleDB extension) for storing metrics.
- TimescaleDB is a Postgres extension for time series data. In our examples, we will use the
timescaledbimage, which contains Postgres with TimescaleDB already installed. During the first run, TimescaleDB will run an auto-tune process to optimize Postgres for time-series workloads.
The Load Tests in Kubernetes feature, which allows you to create, manage, and deploy NBomber tests in Kubernetes, is not available when running in Docker.
Prerequisites
Before you start, make sure you have:
- Docker 20.10+ and Docker Compose v2 installed
- Ports
5333(NBomber Studio) and5432(TimescaleDB) free on the host
Step 1 — Create docker-compose.yaml
Create a docker-compose.yaml file with the following content. It sets up both NBomber Studio and TimescaleDB.
services:
  timescaledb:
    image: timescale/timescaledb:2.25.0-pg18-oss
    command: postgres -c 'max_connections=500'
    restart: always
    ports:
      - "5432:5432"
    volumes:
      - nb_studio_data:/var/lib/postgresql/data
    environment:
      POSTGRES_DB: nb_studio_db
      POSTGRES_USER: nb_studio_db
      POSTGRES_PASSWORD: nb_studio_db
    healthcheck:
      test: ["CMD-SHELL", "pg_isready -d 'user=nb_studio_db dbname=nb_studio_db'"]
      interval: 5s
      timeout: 10s
      retries: 5
      start_period: 5s

  nbomber-studio:
    image: nbomberdocker/nbomber-studio:latest
    ports:
      - "5333:8080"
    depends_on:
      timescaledb:
        condition: service_healthy
    environment:
      POSTGRESQL__CONNECTIONSTRING: "Host=timescaledb;Port=5432;Username=nb_studio_db;Password=nb_studio_db;Database=nb_studio_db;Pooling=true;"

volumes:
  nb_studio_data:
    driver: local
You can find the complete example at this link.
Step 2 — Start the containers
From the folder containing the docker-compose.yaml file, start NBomber Studio and its dependencies:
docker compose up -d
Verify that both containers are running and healthy:
docker compose ps
You should see timescaledb reporting a healthy status and nbomber-studio running before continuing.
Step 3 — Open NBomber Studio
Open a web browser and navigate to NBomber Studio. It is hosted locally in Docker and accessible at:
http://localhost:5333
You should see the login form.
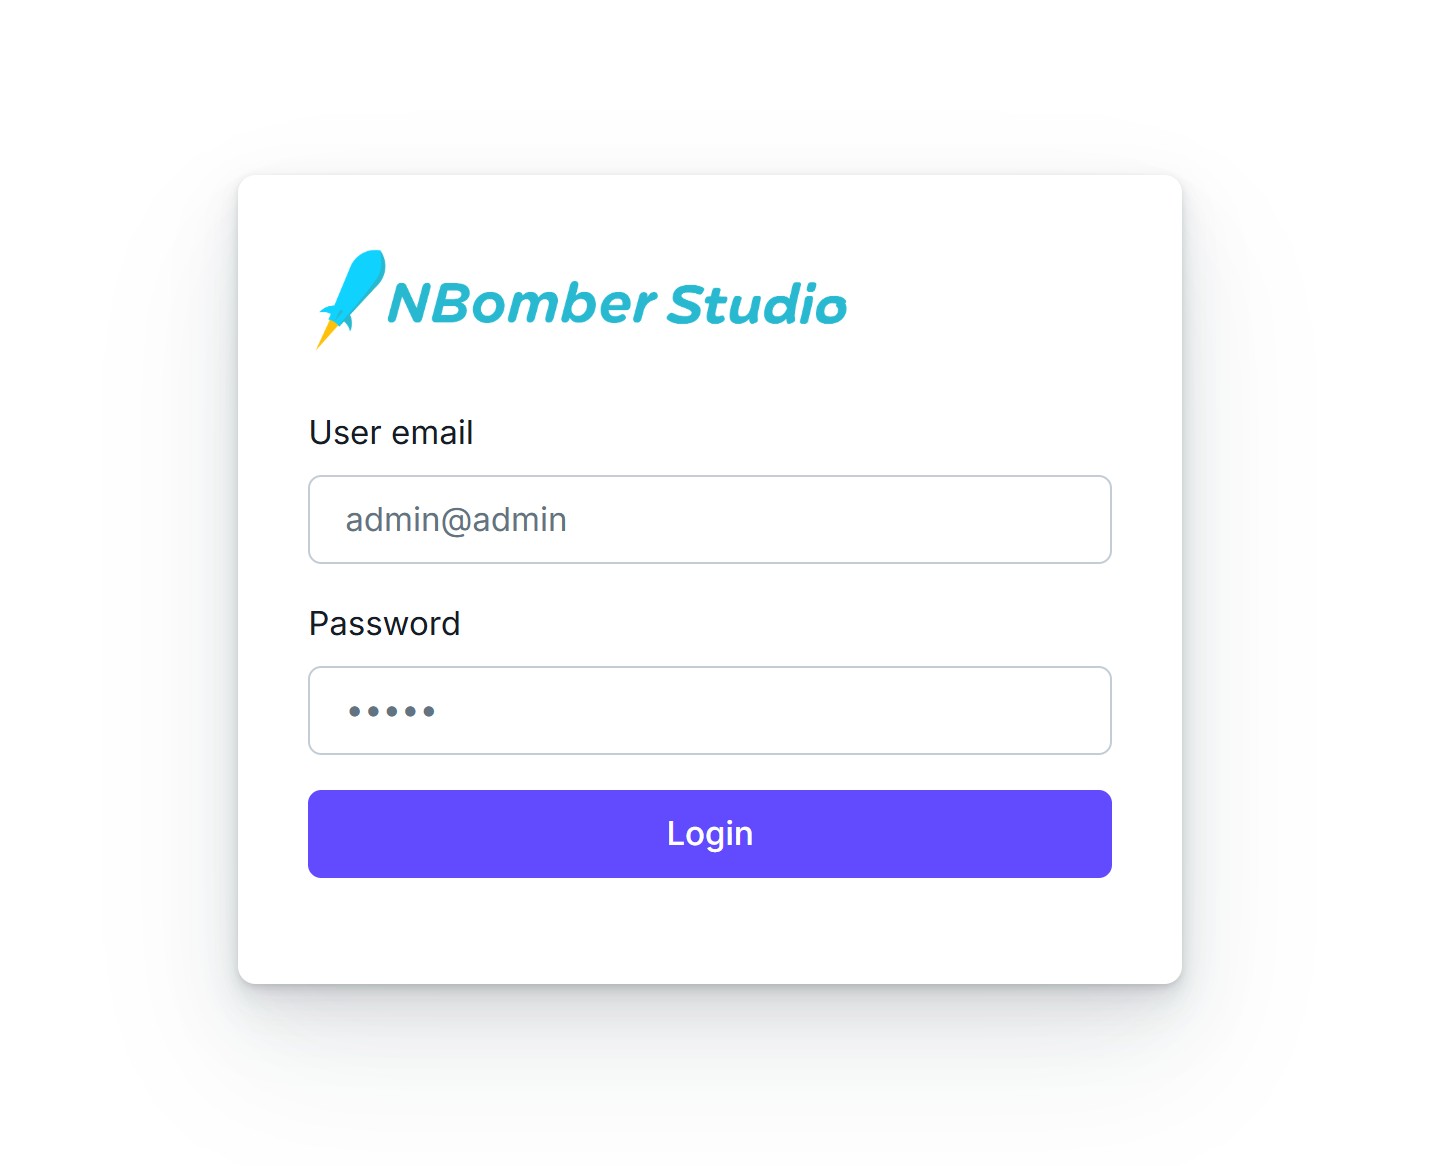
By default, NBomber Studio installs with Static User Auth enabled, so you need to enter the default admin credentials.
email: admin@admin
password: admin
You can disable Auth completely by specifying the env variable AUTH__ENABLED: "false". Example:
nbomber-studio:
  image: nbomberdocker/nbomber-studio:latest
  ...
  environment:
    POSTGRESQL__CONNECTIONSTRING: "Host=timescaledb;Port=5432;Username=nb_studio_db;Password=nb_studio_db;Database=nb_studio_db;Pooling=true;"
    AUTH__ENABLED: "false"
More info about Auth is here.
Change the default admin credentials before exposing NBomber Studio outside localhost. The defaults above are intended for local evaluation only. See Auth configuration for production guidance.
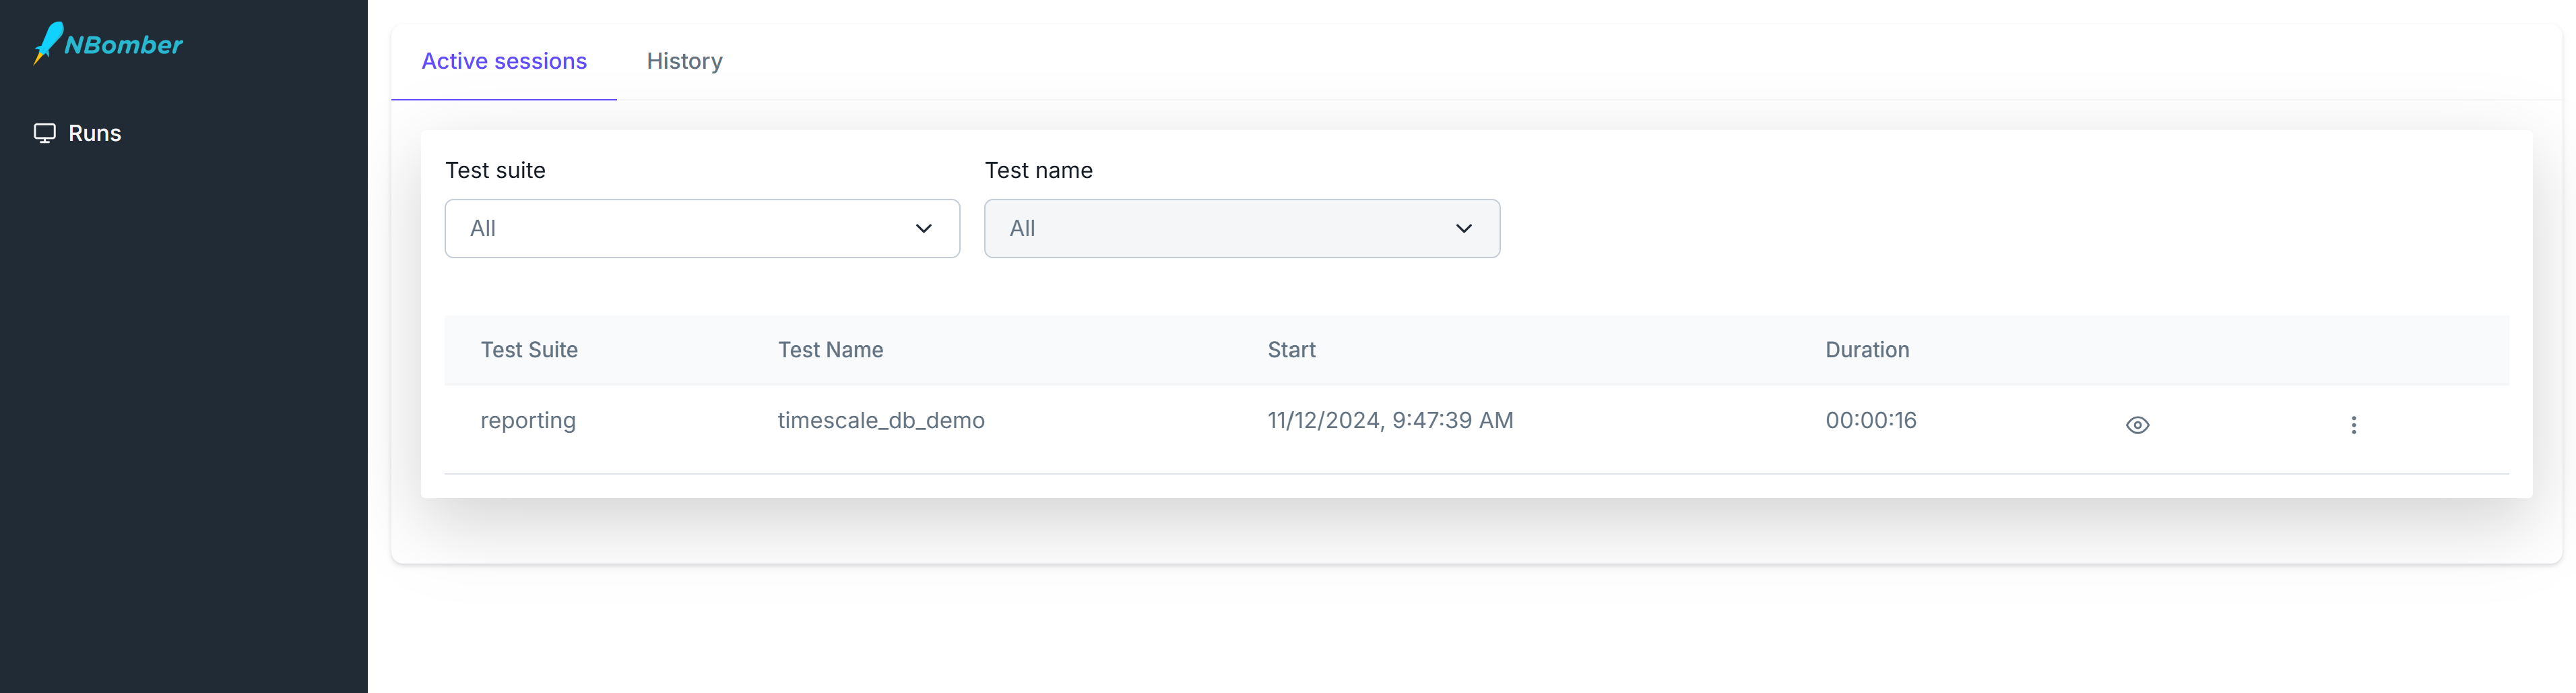
After entering the credentials, you should be redirected to the Sessions page. You will see a dashboard displaying active sessions, which will initially be empty.
Step 4 — Run your first load test
Let's run an NBomber load test that sends metrics to TimescaleDB so we can see them in NBomber Studio. We'll set up a basic "hello world" test that writes metrics into TimescaleDB.
To write metrics into TimescaleDB, we’ll use the NBomber Sink for Timescale.
The following is an example of a load test that writes data into TimescaleDB.
var scenario = Scenario.Create("user_flow_scenario", async context =>
{
    ...
})
.WithLoadSimulations(
    Simulation.Inject(rate: 200, interval: TimeSpan.FromSeconds(1), during: TimeSpan.FromSeconds(30))
);

NBomberRunner
    .RegisterScenarios(scenario)
    .WithReportingSinks(
        new TimescaleDbSink(new TimescaleDbSinkConfig(connectionString: "Host=localhost;Port=5432;Database=nb_studio_db;Username=nb_studio_db;Password=nb_studio_db;Pooling=true;"))
    )
    .Run(args);
You can find the complete example at this link.
Alternative: load the connection string from infra-config.json
The connection string for PostgreSQL (TimescaleDB) can also be loaded from an external infra-config.json file.
{
  "TimescaleDbSink":{
    "ConnectionString": "Host=localhost;Port=5432;Database=nb_studio_db;Username=nb_studio_db;Password=nb_studio_db;Pooling=true;"
  }
}
Then point NBomberRunner at it:
NBomberRunner
    .RegisterScenarios(scenario)
    .LoadInfraConfig("infra-config.json")
    .WithReportingSinks(new TimescaleDbSink())
    .Run(args);
Or pass the path via CLI args:
dotnet my-load-test.dll --infra=infra-config.json
NBomber Studio (running inside Docker) connects to TimescaleDB using the Compose service name Host=timescaledb. The load test runs on your host machine and reaches TimescaleDB through the published port, so it uses Host=localhost.
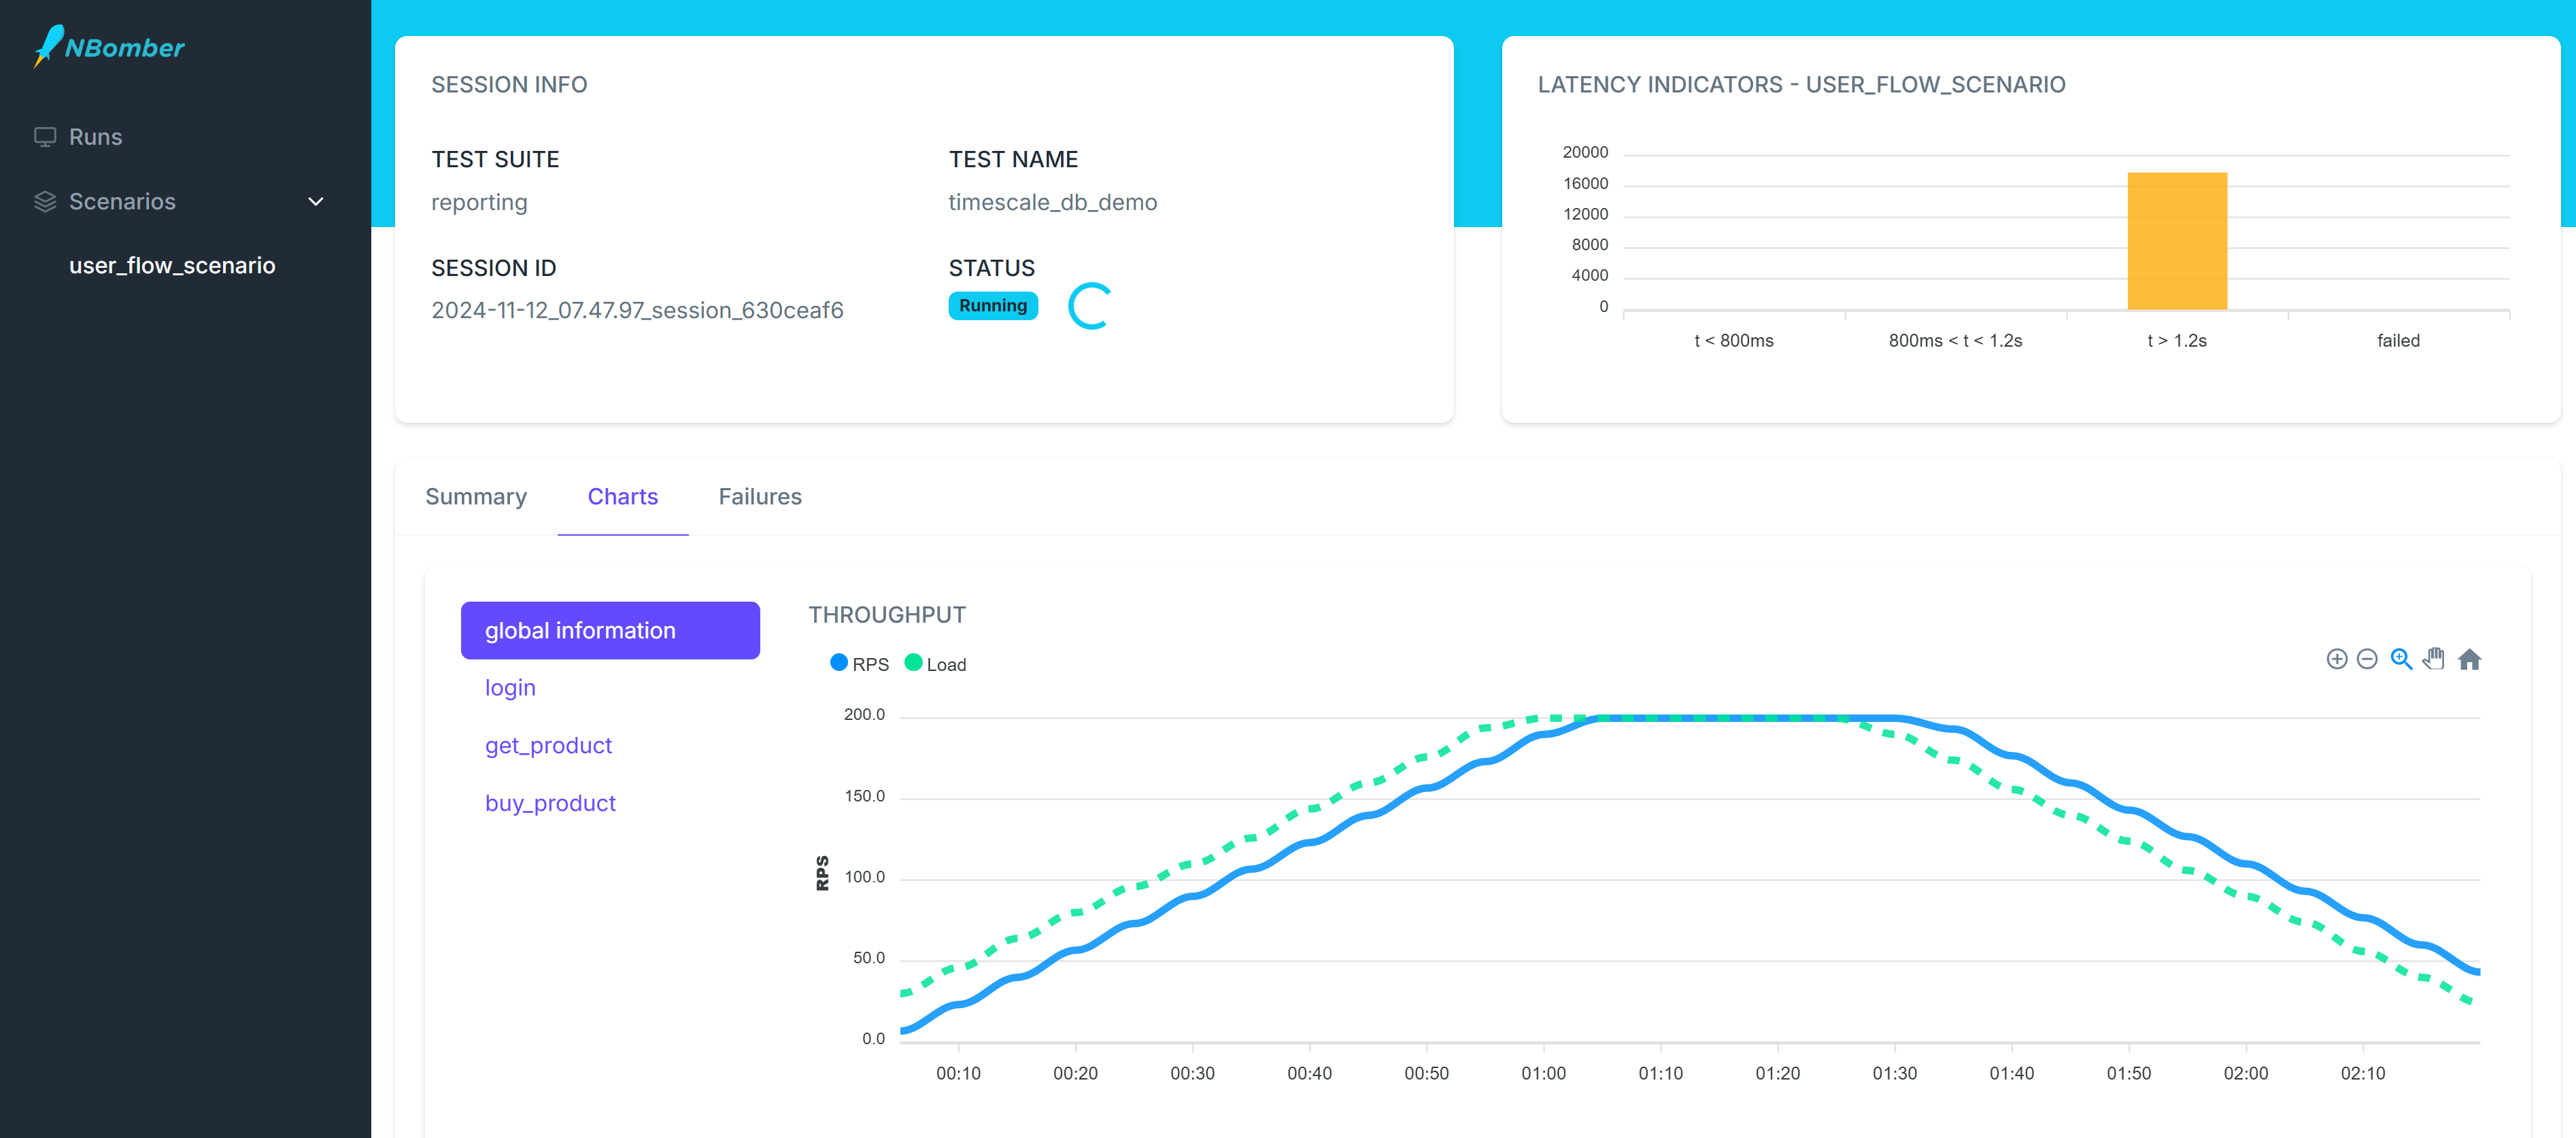
After starting the scenario, you should see one active session appear. NBomber Studio automatically detects real-time data updates and refreshes the screen accordingly.
Now we can navigate to this session and analyze our real-time metrics. The dashboard will refresh according to the reporting interval specified in the load test.