Getting started
This page covers how to get started with NBomber Studio.
We assume that NBomber Studio is already installed and working. If not, we recommend starting with the simplest installation using Docker.
Run load test
Let's try to run NBomber load test, which will send metrics to TimescaleDB, allowing us to see them in NBomber Studio. For this, let’s set up a basic test that writes data into TimescaleDB.
To write metrics into TimescaleDB, we’ll use the NBomber Sink for Timescale.
The following is an example of a load test that writes data into TimescaleDB.
var scenario = Scenario.Create("user_flow_scenario", async context =>
{
    ...
})
.WithLoadSimulations(
    Simulation.Inject(rate: 200, interval: TimeSpan.FromSeconds(1), during: TimeSpan.FromSeconds(30))
);

NBomberRunner
    .RegisterScenarios(scenario)
    .WithReportingSinks(
        new TimescaleDbSink(new TimescaleDbSinkConfig(connectionString: "YOUR CONNECTION STRING"))
    )
    .Run();
You can find the complete example at this link.
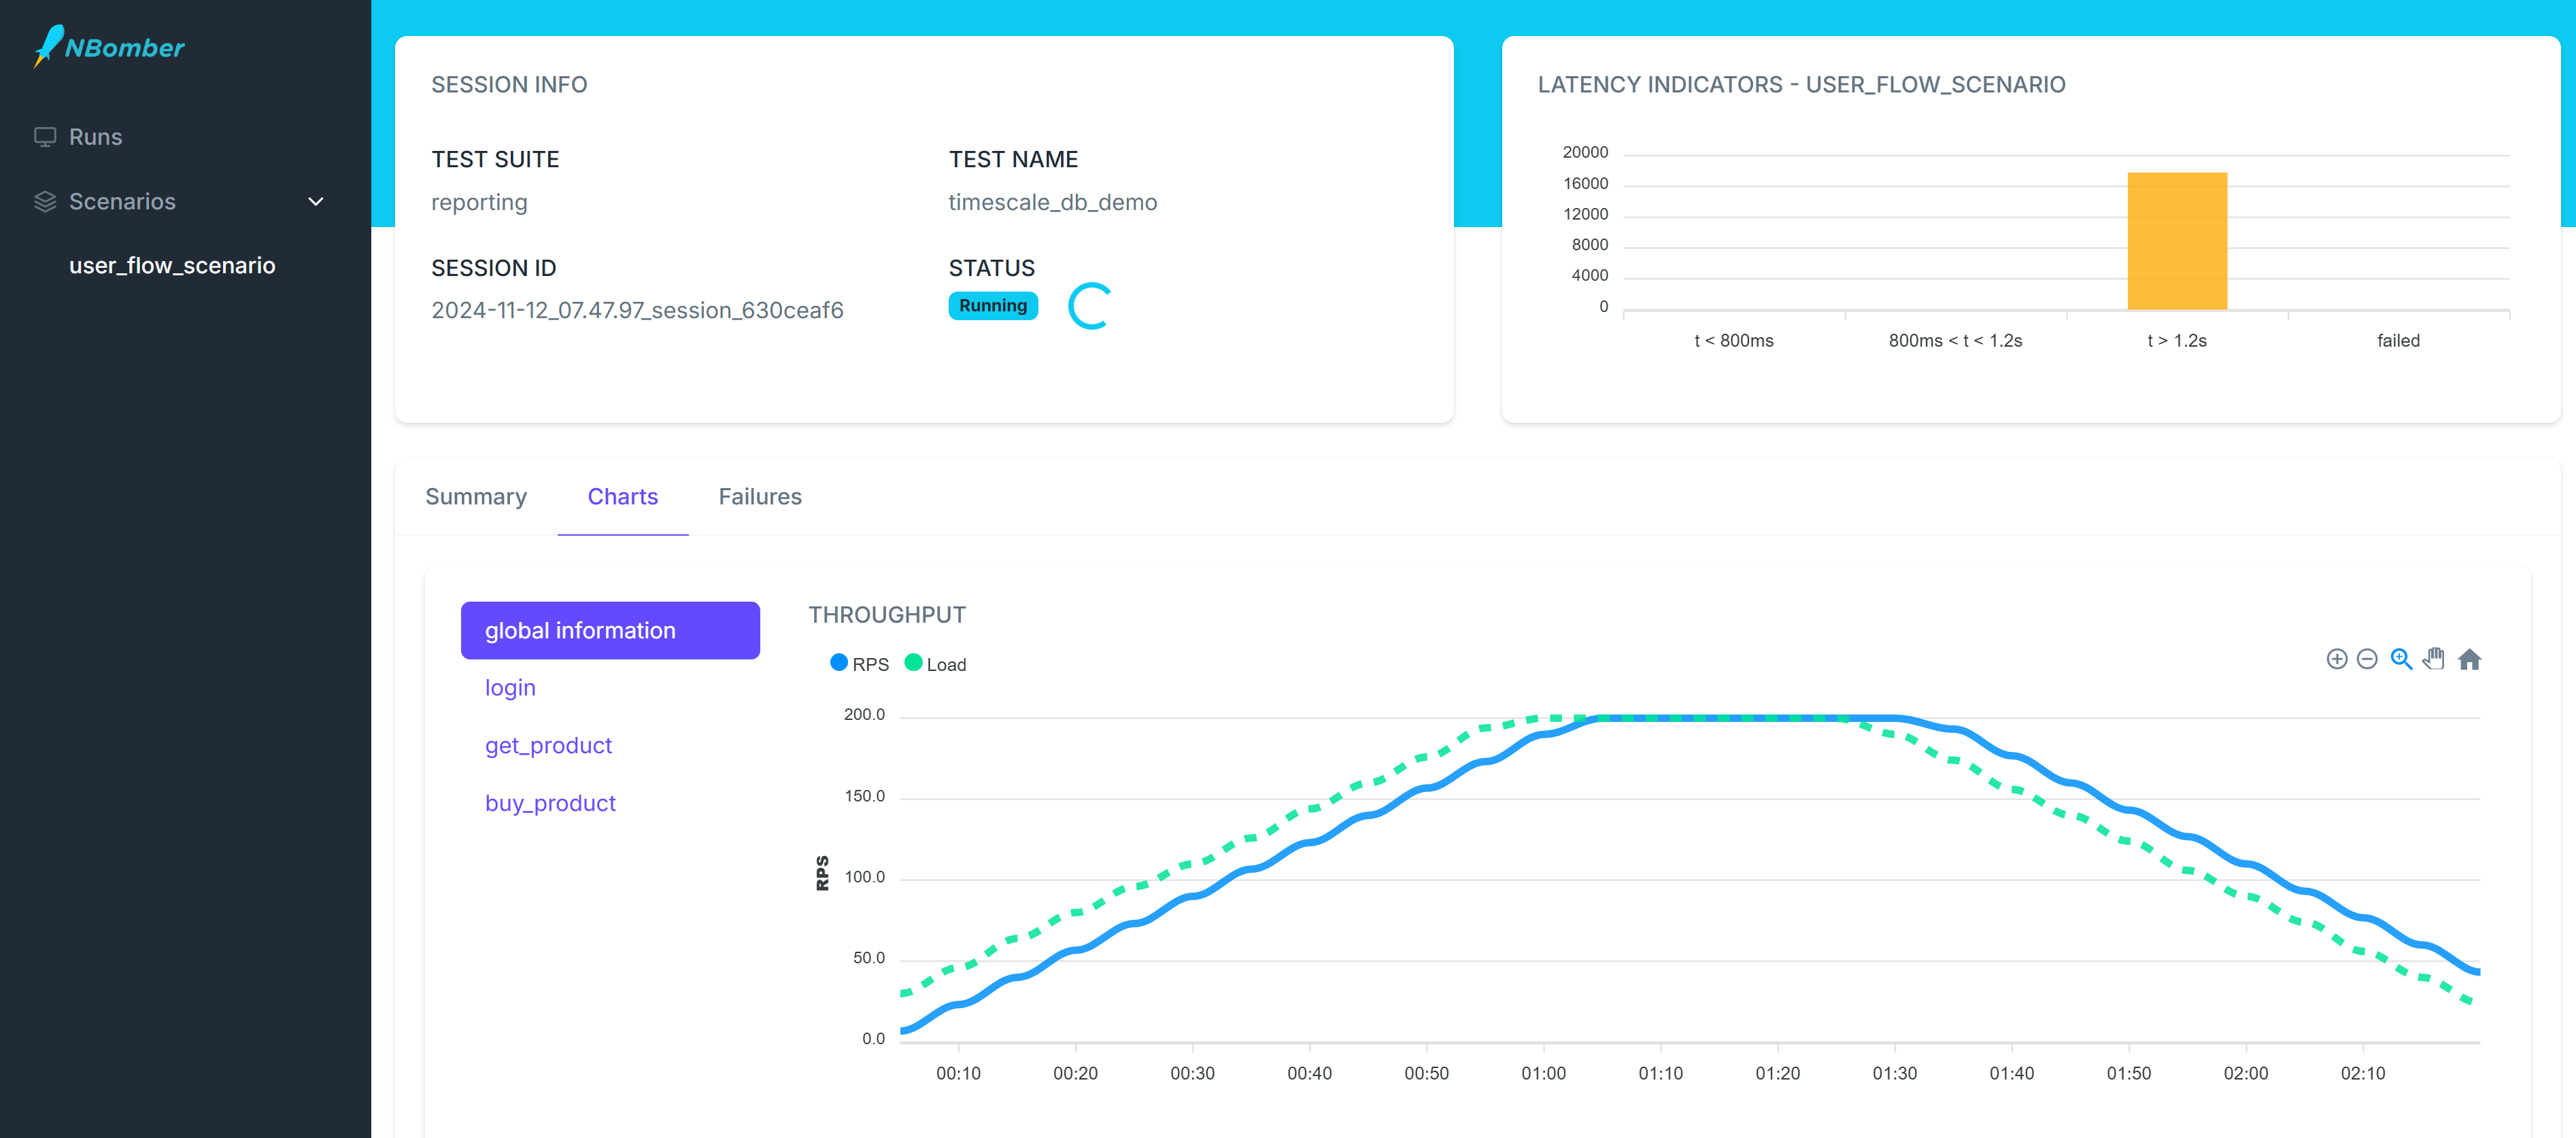
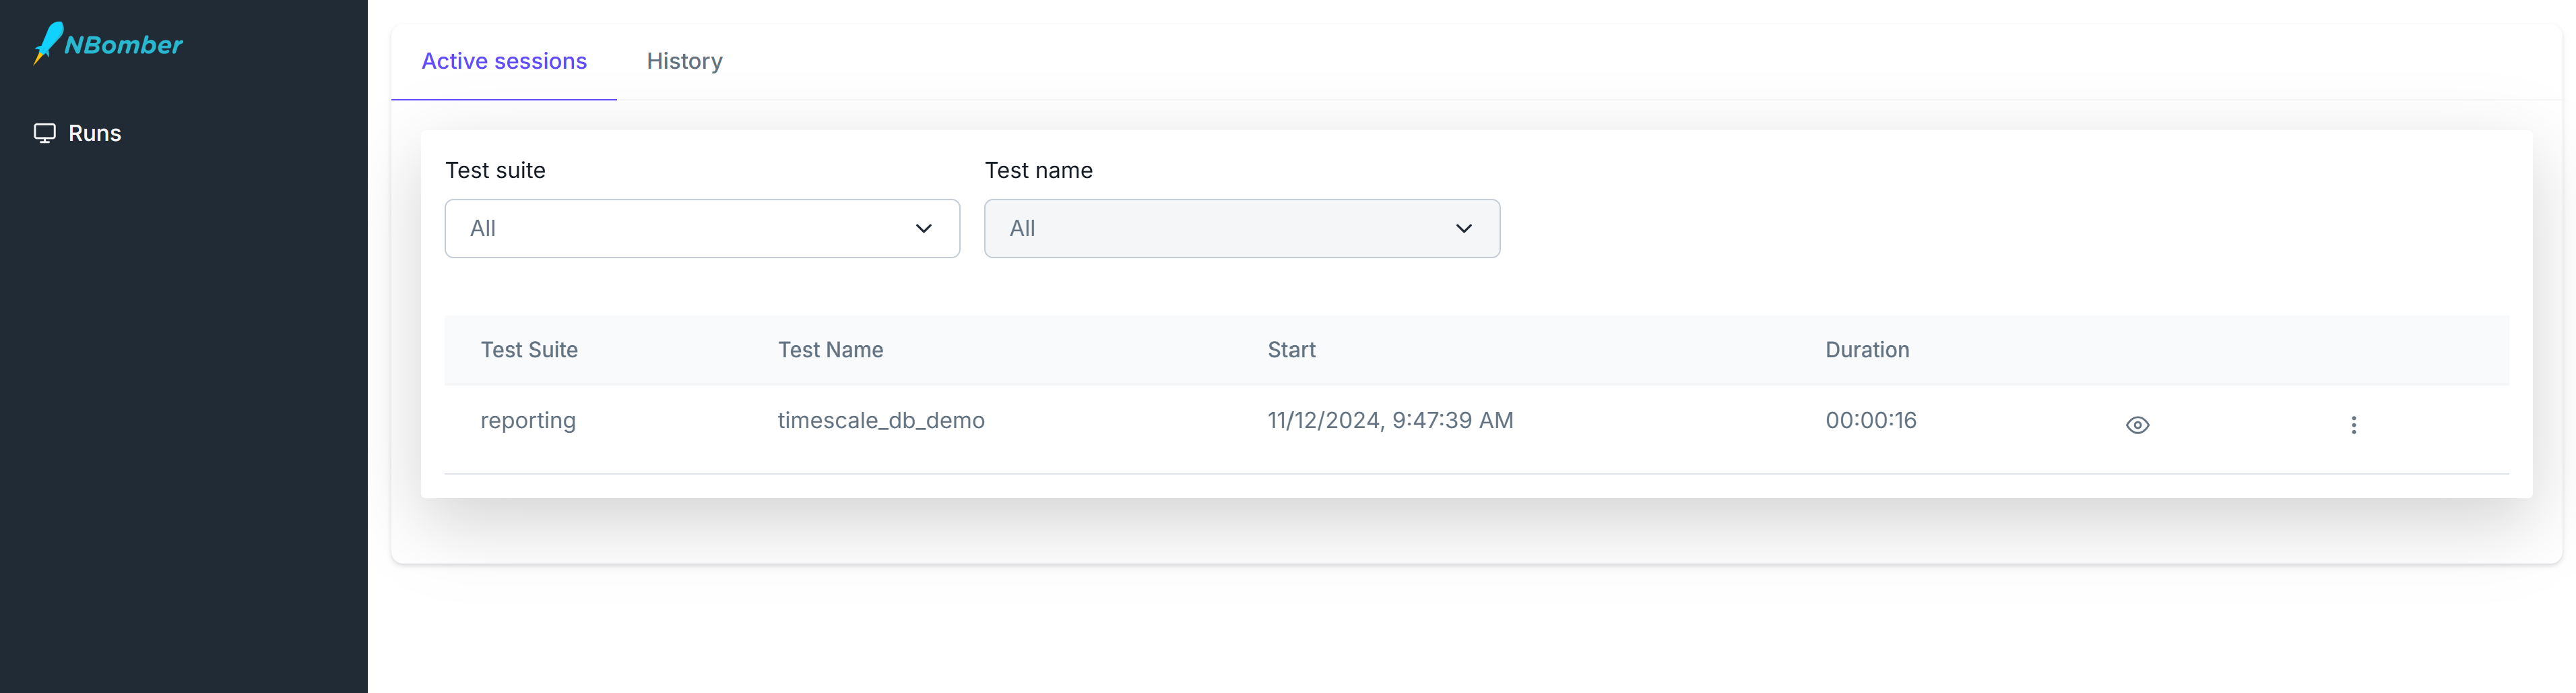
After starting the scenario, you should see one active session appear. NBomber Studio automatically detects real-time data updates and refreshes the screen accordingly.
Now we can navigate to this session and analyze our real-time metrics. The dashboard will refresh according to the reporting interval specified in the load test.