MQTT
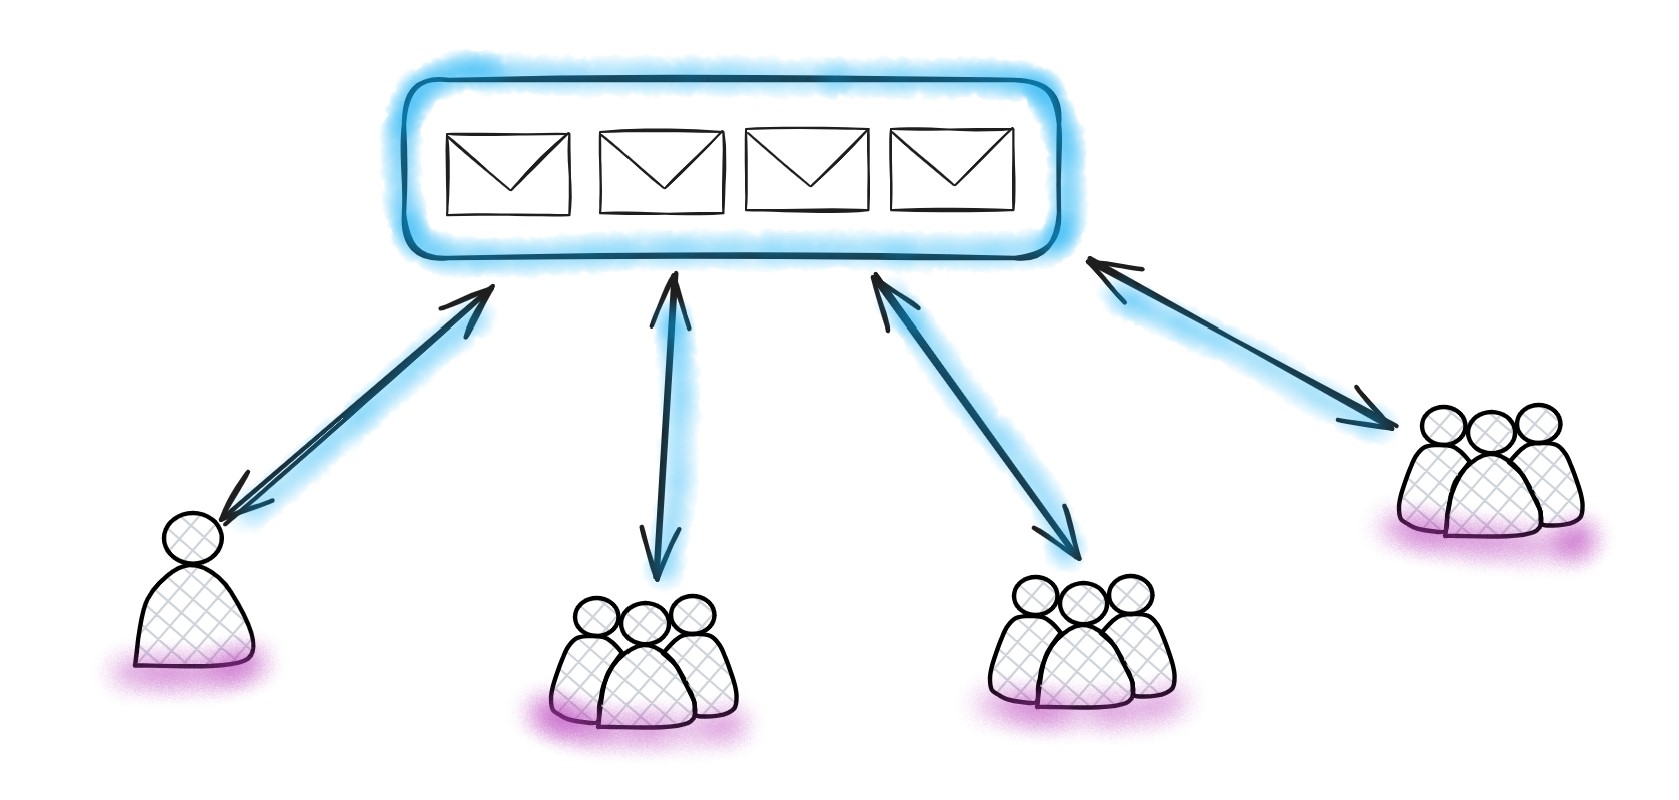
MQTT (Message Queuing Telemetry Transport) is a standard messaging protocol for the Internet of Things (IoT). It is designed as an extremely lightweight publish/subscribe messaging transport that is ideal for connecting remote devices with a small code footprint and minimal network bandwidth. MQTT today is used in a wide variety of industries, such as automotive, manufacturing, telecommunications, oil and gas, etc.
To work with MQTT protocol, NBomber provides NBomber.MQTT plugin that includes functionality for sending and receiving messages, including tracking of data transfer and status codes.
This package is experimental and might be subject to breaking API changes in the future. While we intend to keep experimental packages as stable as possible, we may need to introduce breaking changes.
To install NBomber.MQTT package you should execute the following dotnet command:
![]()

dotnet add package NBomber.MQTT
MQTT API
MQTT plugin provides a wrapper over the popular library MQTTnet. The wrapper implements basic methods for publishing and receiving messages.
var payload = Data.GenerateRandomBytes(200);

var scenario = Scenario.Create("mqtt_scenario", async ctx =>
{
    using var client = new MqttClient(new MqttFactory().CreateMqttClient());

    var topic = $"/clients/{ctx.ScenarioInfo.InstanceId}";

    var connect = await Step.Run("connect", ctx, async () =>
    {
        var clientOptions = new MqttClientOptionsBuilder()
            .WithTcpServer("localhost")
            // .WithWebSocketServer(options => options.WithUri("ws://localhost:8083/mqtt"))
            .WithCleanSession()
            .WithClientId($"client_{ctx.ScenarioInfo.InstanceId}")
            .Build();

        var response = await client.Connect(clientOptions);
        return response;
    });

    var subscribe = await Step.Run("subscribe", ctx, () => client.Subscribe(topic));

    var publish = await Step.Run("publish", ctx, async () =>
    {
        var msg = new MqttApplicationMessageBuilder()
            .WithTopic(topic)
            .WithPayload(payload)
            .Build();

        var response = await client.Publish(msg);
        return response;
    });

    var receive = await Step.Run("receive", ctx, async () =>
    {
        var response = await client.Receive();
        return response;
    });

    var disconnect = await Step.Run("disconnect", ctx, () => client.Disconnect());

    return Response.Ok();
});
You can find the complete example by this link.
Original IMqttClient
NBomber MQTT plugin is basically a wrapper over the popular library MQTTnet. If you need to work with the original IMqttClient from MQTTnet library, you can use public Client property. All native methods are available for usage.
using var mqtt = new MqttClient(new MqttFactory().CreateMqttClient());

var originalClient = mqtt.Client;
Examples
Here you will find some useful examples of working with the MQTT protocol and NBomber to cover different workloads.
Ping Pong Example
This is a basic example meant to demonstrate the API usage. In this example, we create an MQTT client that:
- Connects to the broker
- Subscribes to its own topic (self topic) using the scenario instance ID (ctx.ScenarioInfo.InstanceId)
- Publishes a message to self topic
- Awaits and receives a message from the self topic
- Disconnects
var payload = Data.GenerateRandomBytes(200);

var scenario = Scenario.Create("mqtt_scenario", async ctx =>
{
    var topic = $"/clients/{ctx.ScenarioInfo.InstanceId}";
    using var mqttClient = new MqttClient(new MqttClientFactory().CreateMqttClient());

    var connect = await Step.Run("connect", ctx, async () =>
    {
        var options = new MqttClientOptionsBuilder()
            .WithTcpServer("localhost")
            .Build();

        return await mqttClient.Connect(options);
    });

    var subscribe = await Step.Run("subscribe", ctx, async () =>
    {
        var response = await mqttClient.Subscribe(topic);
        return response;
    });

    var publish = await Step.Run("publish", ctx, async () =>
    {
        var msg = new MqttApplicationMessageBuilder()
            .WithTopic(topic)
            .WithPayload(payload)
            .Build();

        return await mqttClient.Publish(msg);
    });

    var receive = await Step.Run("receive", ctx, async () =>
    {
        // pass the ScenarioCancellationToken to stop waiting for a response if the scenario finish event is triggered
        var response = await mqttClient.Receive(ctx.ScenarioCancellationToken);
        return response;
    });

    var disconnect = await Step.Run("disconnect", ctx, async () =>
    {
        var response = await mqttClient.Disconnect();
        return response;
    });

    return Response.Ok();
})
You can find the complete example by this link.
ClientPool Example
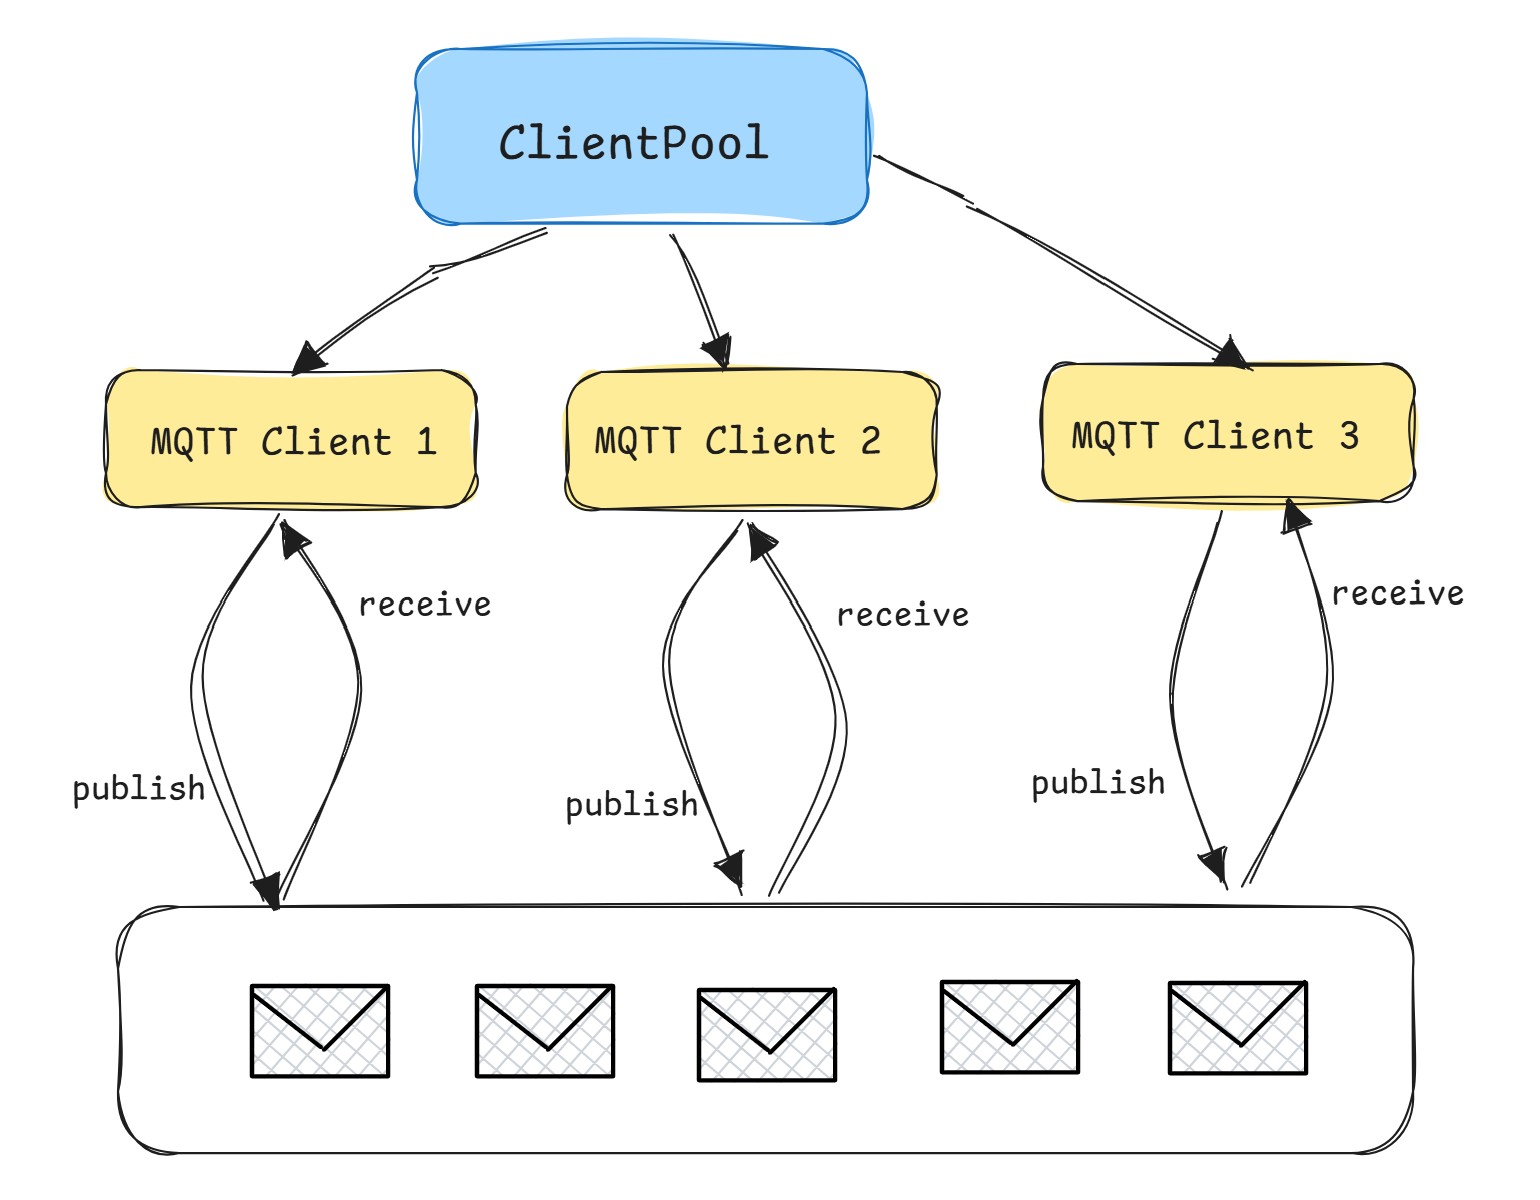
In this example, we create and initialize a list of MQTT clients, which remain active throughout the entire load test using a ClientPool abstraction. Each client continuously and sequentially performs two steps:
- publishes a message to self topic
- receives a message from the self topic
All clients run in parallel to simulate multiple connected clients. This test measures how active concurrent connections impact the performance of the message broker. Also it measures both the throughput and latency for publish and receive operations.
var clientPool = new ClientPool<MqttClient>();
byte[] payload = [];

var scenario = Scenario.Create("mqtt_scenario", async ctx =>
{
    // get a client from the pool by Scenario InstanceID
    var mqttClient = clientPool.GetClient(ctx.ScenarioInfo.InstanceNumber);

    var publish = await Step.Run("publish", ctx, async () =>
    {
        var topic = $"/clients/{ctx.ScenarioInfo.InstanceId}";
        var msg = new MqttApplicationMessageBuilder()
            .WithTopic(topic)
            .WithPayload(payload)
            .WithQualityOfServiceLevel(MqttQualityOfServiceLevel.AtMostOnce)
            .Build();

        return await mqttClient.Publish(msg);
    });

    var receive = await Step.Run("receive", ctx, async () =>
    {
        var response = await mqttClient.Receive(ctx.ScenarioCancellationToken);
        return response;
    });

    return Response.Ok();
})
.WithInit(async context =>
{
    var config = context.CustomSettings.Get<CustomScenarioSettings>();
    payload = Data.GenerateRandomBytes(config.MsgSizeBytes);

    for (var i = 0; i < config.ClientCount; i++)
    {
        var topic = $"/clients/mqtt_scenario_{i}";
        var clientId = $"mqtt_client_{i}";
        var options = new MqttClientOptionsBuilder()
            .WithTcpServer(config.MqttServerUrl)
            .WithClientId(clientId)
            .Build();

        var mqttClient = new MqttClient(new MqttClientFactory().CreateMqttClient());
        var connectResult = await mqttClient.Connect(options);

        if (!connectResult.IsError)
        {
            await mqttClient.Subscribe(topic, MqttQualityOfServiceLevel.AtMostOnce);
            clientPool.AddClient(mqttClient);
        }
        else
            throw new Exception("client can't connect to the MQTT broker");

        await Task.Delay(10);
    }
})
.WithClean(ctx =>
{
    clientPool.DisposeClients(client => client.Dispose());
    return Task.CompletedTask;
});
You can find the complete example by this link.
Independent Actors Example
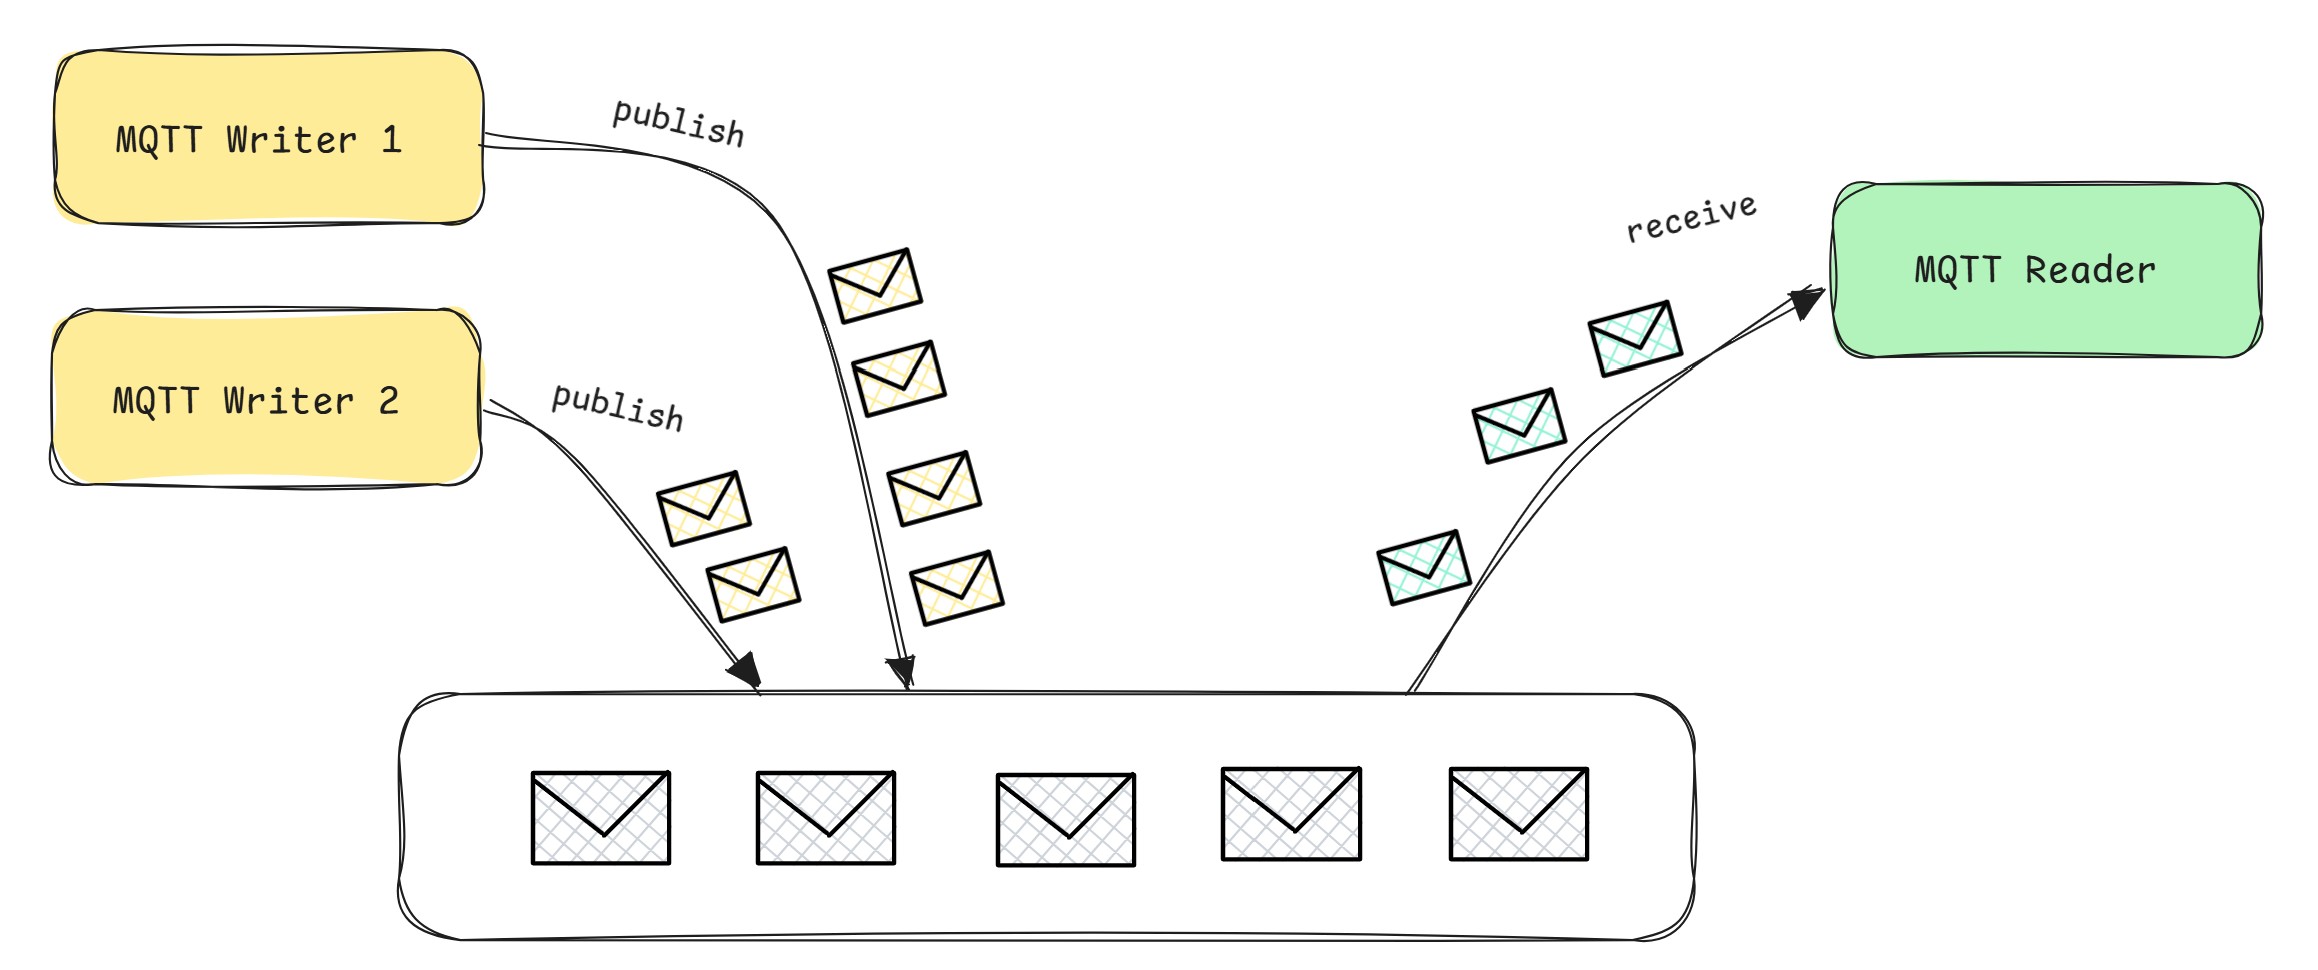
There could be situations where you have an independent Publisher/Writer and Consumer/Reader, each working separately. In such cases, you may want to measure both the throughput and the message latency from the publisher to the consumer.
This particular case is usually tricky to cover with any load testing framework.
Imagine two messages being published by two independent publishers at the same time, say at
"00:00:10". The consumer waits to receive the messages — the first received message will have its latency measured correctly, but the second message will be processed immediately after the first one. This will distort the latency measurement for the second message, making it appear as if there was zero delay.
Example:
// It's a pseudo-code just to show how Publisher and Consumer scenarios could be modeled.
// Publisher: sends messages to a topic
var publish_scenario = Scenario.Create("publish_scenario", async ctx =>
{
    var payload = Data.GenerateRandomBytes(200);

    var topic = $"/clients/all";
    var msg = new MqttApplicationMessageBuilder()
        .WithTopic(topic)
        .WithPayload(payload)
        .WithQualityOfServiceLevel(MqttQualityOfServiceLevel.AtMostOnce)
        .Build();

    return await mqttClient.Publish(msg);
})
.WithLoadSimulations(
    // we run 2 Publisher(s), which will send messages concurrently
    Simulation.KeepConstant(2, TimeSpan.FromSeconds(30))
);

// Consumer: listens for messages and measures latency
var consume_scenario = Scenario.Create("consume_scenario", async ctx =>
{
    var message = await mqttClient.Receive(); // The second message will be received immediately after the first one,
                                              // because both messages were published at the same time.
                                              // This will distort the latency measurement for the second message,
    return Response.Ok();                     // making it appear as if there was zero delay
})
.WithLoadSimulations(
    // we run 1 Consumer
    Simulation.KeepConstant(1, TimeSpan.FromSeconds(30))
);

NBomberRunner
    .RegisterScenarios(publish_scenario, consume_scenario)
    .Run();
In order to fix this measurement, we need to do a few things:
- On the Publisher side: each message should be enriched with a current
timestamp. - On the Consumer side: we read the received message's
timestampand calculate the latency:
var customLatency = DateTime.UtcNow - msg.Timestamp
- We instruct NBomber to use the custom latency via
Response.Ok(customLatency: value)
Example:
var publish_scenario = Scenario.Create("publish_scenario", async ctx =>
{
    var timestamp = DateTimeOffset.UtcNow.ToUnixTimeMilliseconds();

    var msg = new MqttApplicationMessageBuilder()
        .WithTopic("/clients/independentActors")
        .WithPayload(payload)
        .WithUserProperty("timestamp", timestamp.ToString())
        .Build();

    return await mqttClient.Publish(msg);
})
.WithLoadSimulations(
    Simulation.KeepConstant(2, TimeSpan.FromSeconds(30))
);

var consume_scenario = Scenario.Create("consume_scenario", async ctx =>
{
    var message = await mqttClient.Receive(ctx.ScenarioCancellationToken);

    // Final latency is computed by subtracting the current time from the timestamp in the header.
    var timestamp = message.Payload.Value.UserProperties.First(prop => prop.Name == "timestamp").Value;
    var timestampMs = long.Parse(timestamp);
    var latency = DateTimeOffset.UtcNow.ToUnixTimeMilliseconds() - timestampMs;

    return Response.Ok(customLatencyMs: latency, sizeBytes: message.SizeBytes);
})
.WithLoadSimulations(
    Simulation.KeepConstant(1, TimeSpan.FromSeconds(30))
);

NBomberRunner
    .RegisterScenarios(publish_scenario, consume_scenario)
    .Run();
You can find the complete example by this link.