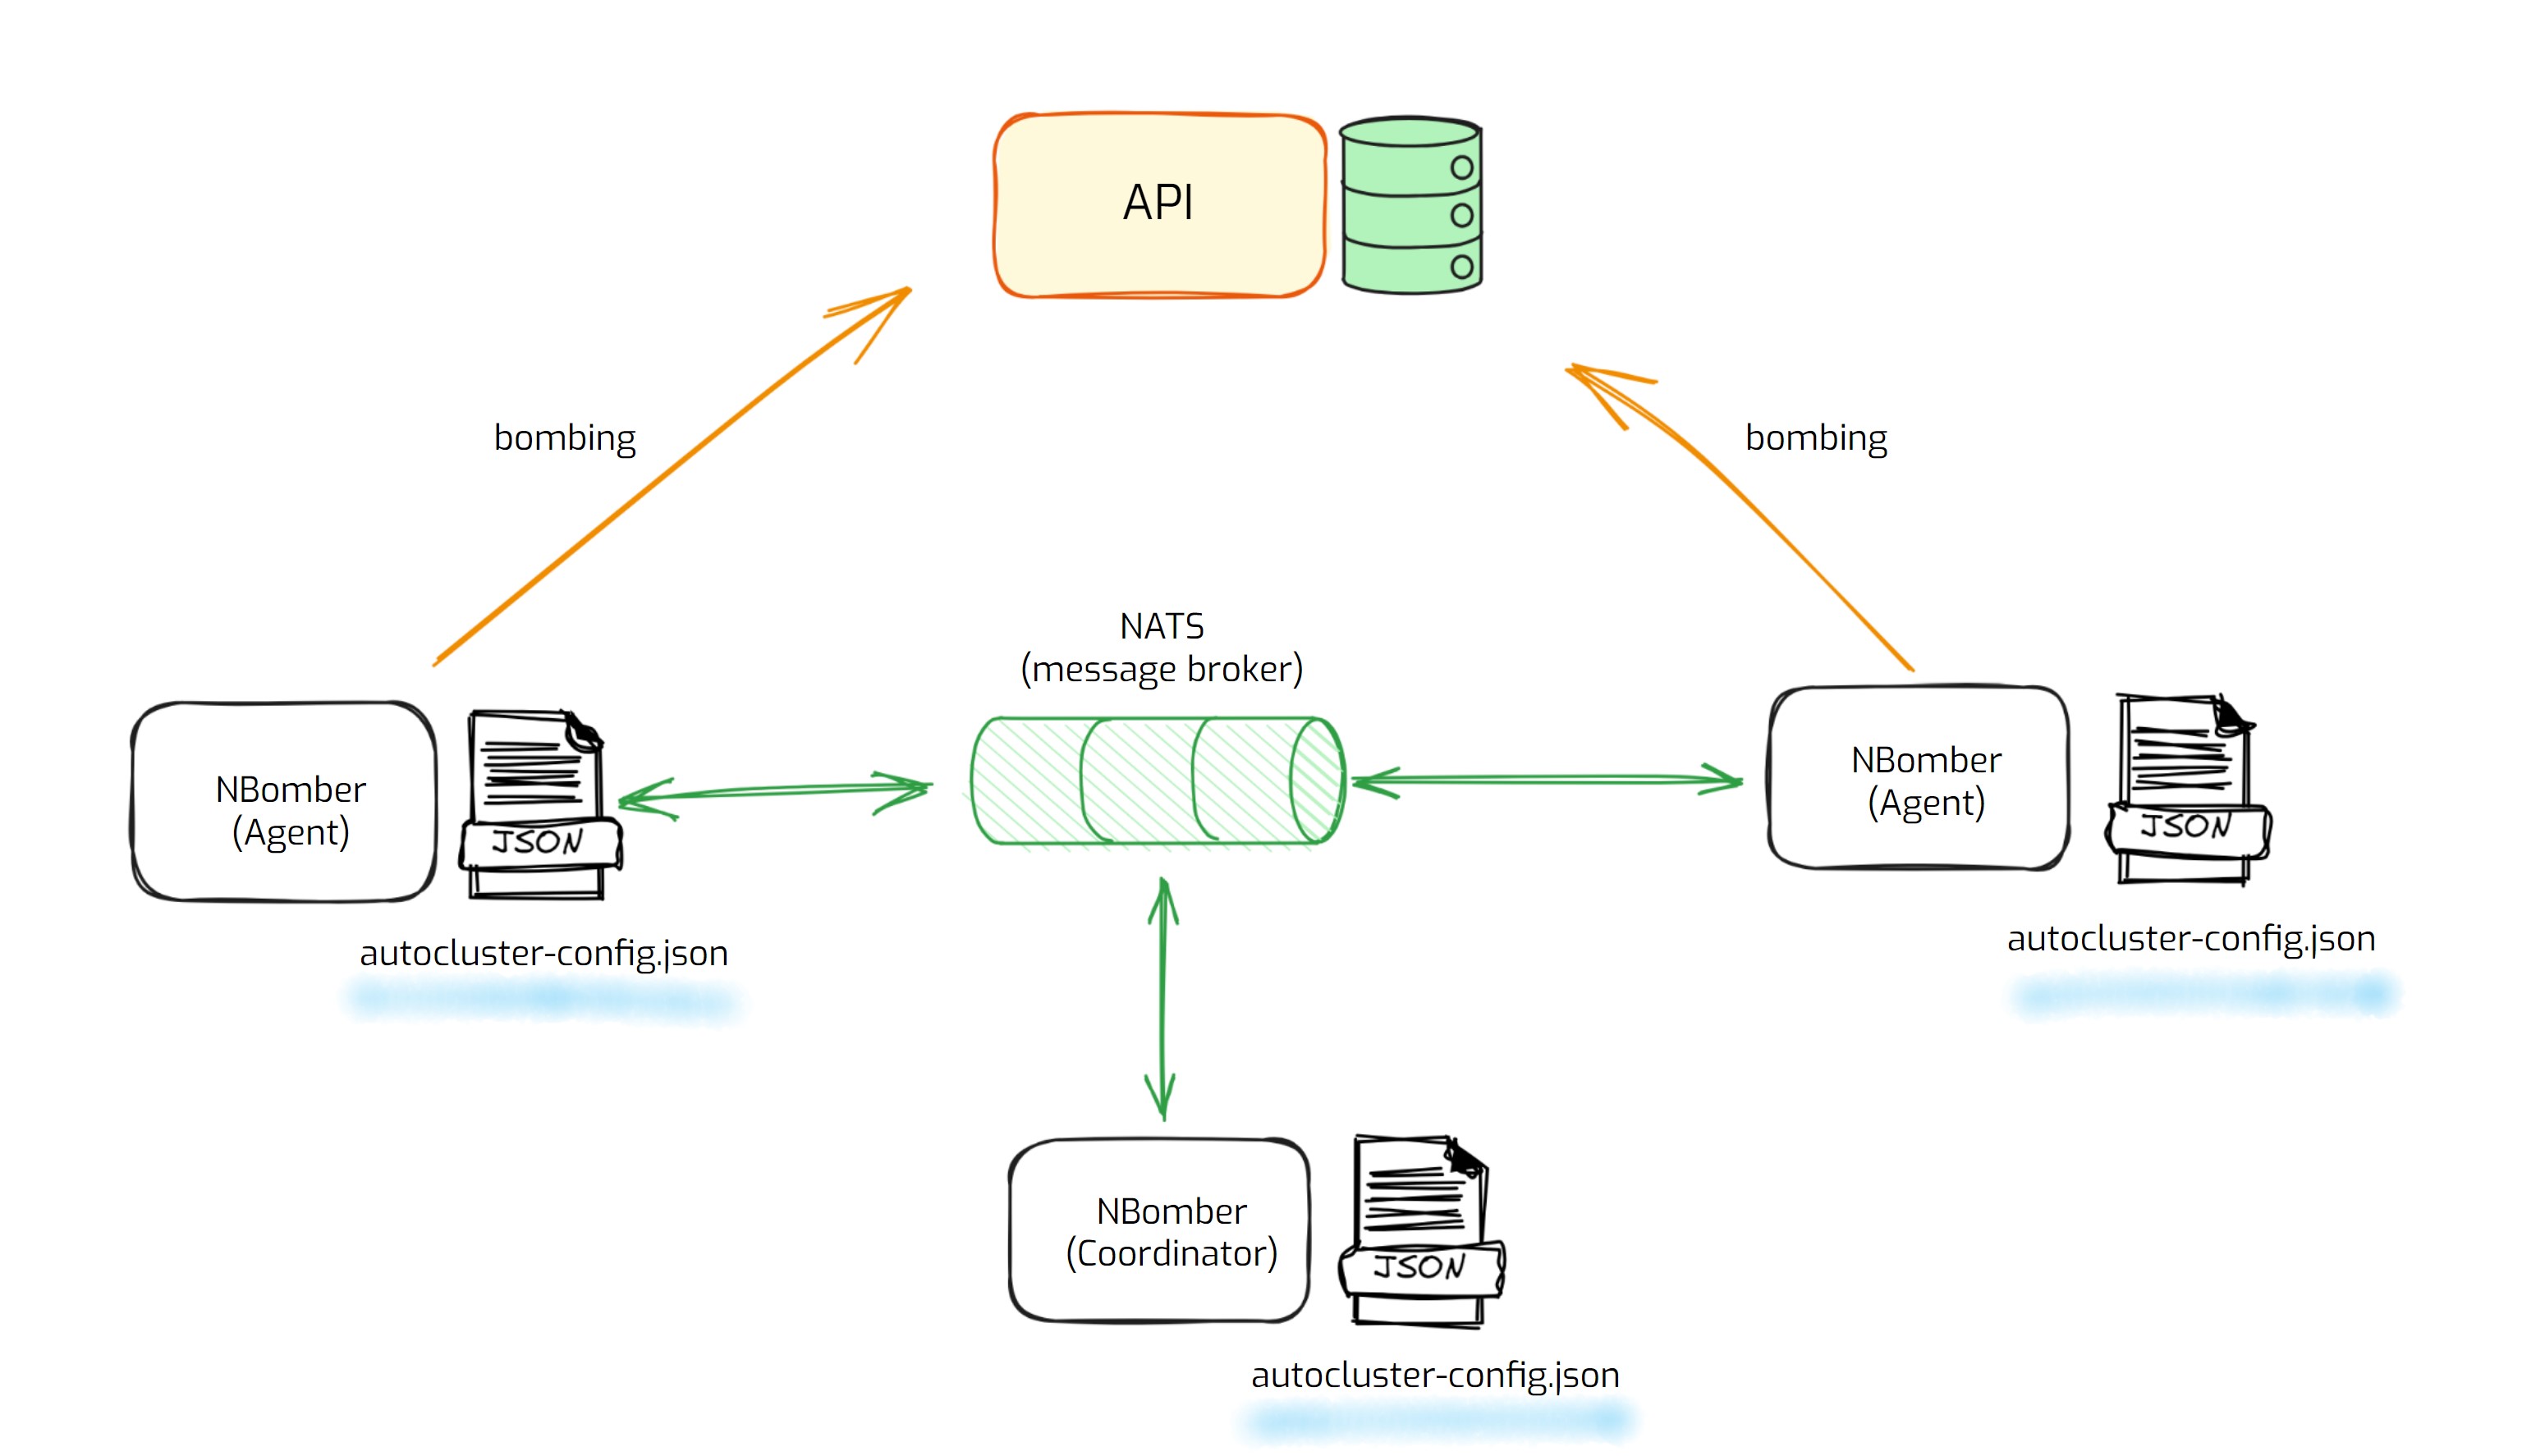
How to Run Cluster

We assume that you are already familiar with:
- The basics of NBomber API (Scenario, Step, NBomberRunner).
- You installed NATS message broker.
To run NBomber in the cluster mode, you need:
- Choose cluster configuration type with related settings.
- Run as many NBomber instances(copies of NBomber process) with the specified configuration type as you want for the cluster.
Cluster configuration types
-
AutoCluster - it's a cluster configuration type that provides an easy way to establish a cluster. With this type of configuration Coordinator will be chosen automatically by leader election. It's recommended to start with
AutoClustersince it is simpler to set up and fits the majority of load tests. -
ManualCluster - this type provides an advanced way to configure a cluster manually for Coordinator and Agents. The main benefit of this type of configuration is that it allows you to choose the scenario placement topology. You will be able to specify the TargetScenarios for Agents and Coordiantor separately. For example, you want to test some web service by running the
Create Userscenario on one Agent node but theRead Userscenario on the second Agent. WithManualClusterconfiguration, you can configure a cluster with a concrete scenario placement per node (AgentGroup) in the cluster. This configuration type is recommended when you have a concrete need for granular scenario placement inside a cluster.
For simplicity, we will be using AutoCluster configuration for a cluster with two nodes (Coordinator + 1 Agent).
{
    "TestSuite": "my test suite",
    "TestName": "my test",

    "ClusterSettings": {

        "AutoCluster": {
            "ClusterId": "test_cluster",
            "NATSServerURL": "nats://localhost",

            "Coordinator": {
                "TargetScenarios": ["test_scenario"]
            },

            "Agent": {
                "TargetScenarios": ["test_scenario"],
                "AgentsCount": 1
            }
        }

    }
}
The main settings are:
ClusterIdis the Id of the NBomber Cluster that will be shared between the NBomber nodes(processes). By this id, NBomber node will be able to discover all participants in the cluster.NATSServerURLis the URL to the NATS host server. In our example, we will use alocalhostsince we host the NATS message broker on the local machine using docker-compose. You can find more info about NATS connection string by this link.TargetScenariosspecifies target scenarios that will be executed in the cluster. You can specify different TargetScenarios for Coordinator and Agents.AgentsCountspecifies the number of Agents that should join the cluster (by ClusterId) to allow Coordinator to start a load test.
Let's assume we already have a Scenario named "test_scenario" that we want to run in the cluster. The only thing that we need is to load the cluster configuration (in our case it's AutoCluster) and run it.
Run Cluster
var scenario = Scenario.Create("test_scenario", async context => { ... });

NBomberRunner
    .RegisterScenarios(scenario)
    .LoadConfig("auto-cluster-config.json")
    .License("YOUR_ENTERPRISE_LICENSE_KEY")
    .Run();
You can find the complete example by this link.
Run via CLI args
MyLoadTest.dll --config="auto-cluster-config.json"
You can also pass other CLI args:
MyLoadTest.dll --config="auto-cluster-config.json" --cluster-agents-count=5 --license=YOUR_LICENSE_KEY
Here, you can find a list of all available CLI arguments.
Run Local Dev Cluster
If you don't have an enterprise license key but you want to try NBomber Cluster you can run it in the development mode via LocalDevCluster.