Auto Cluster
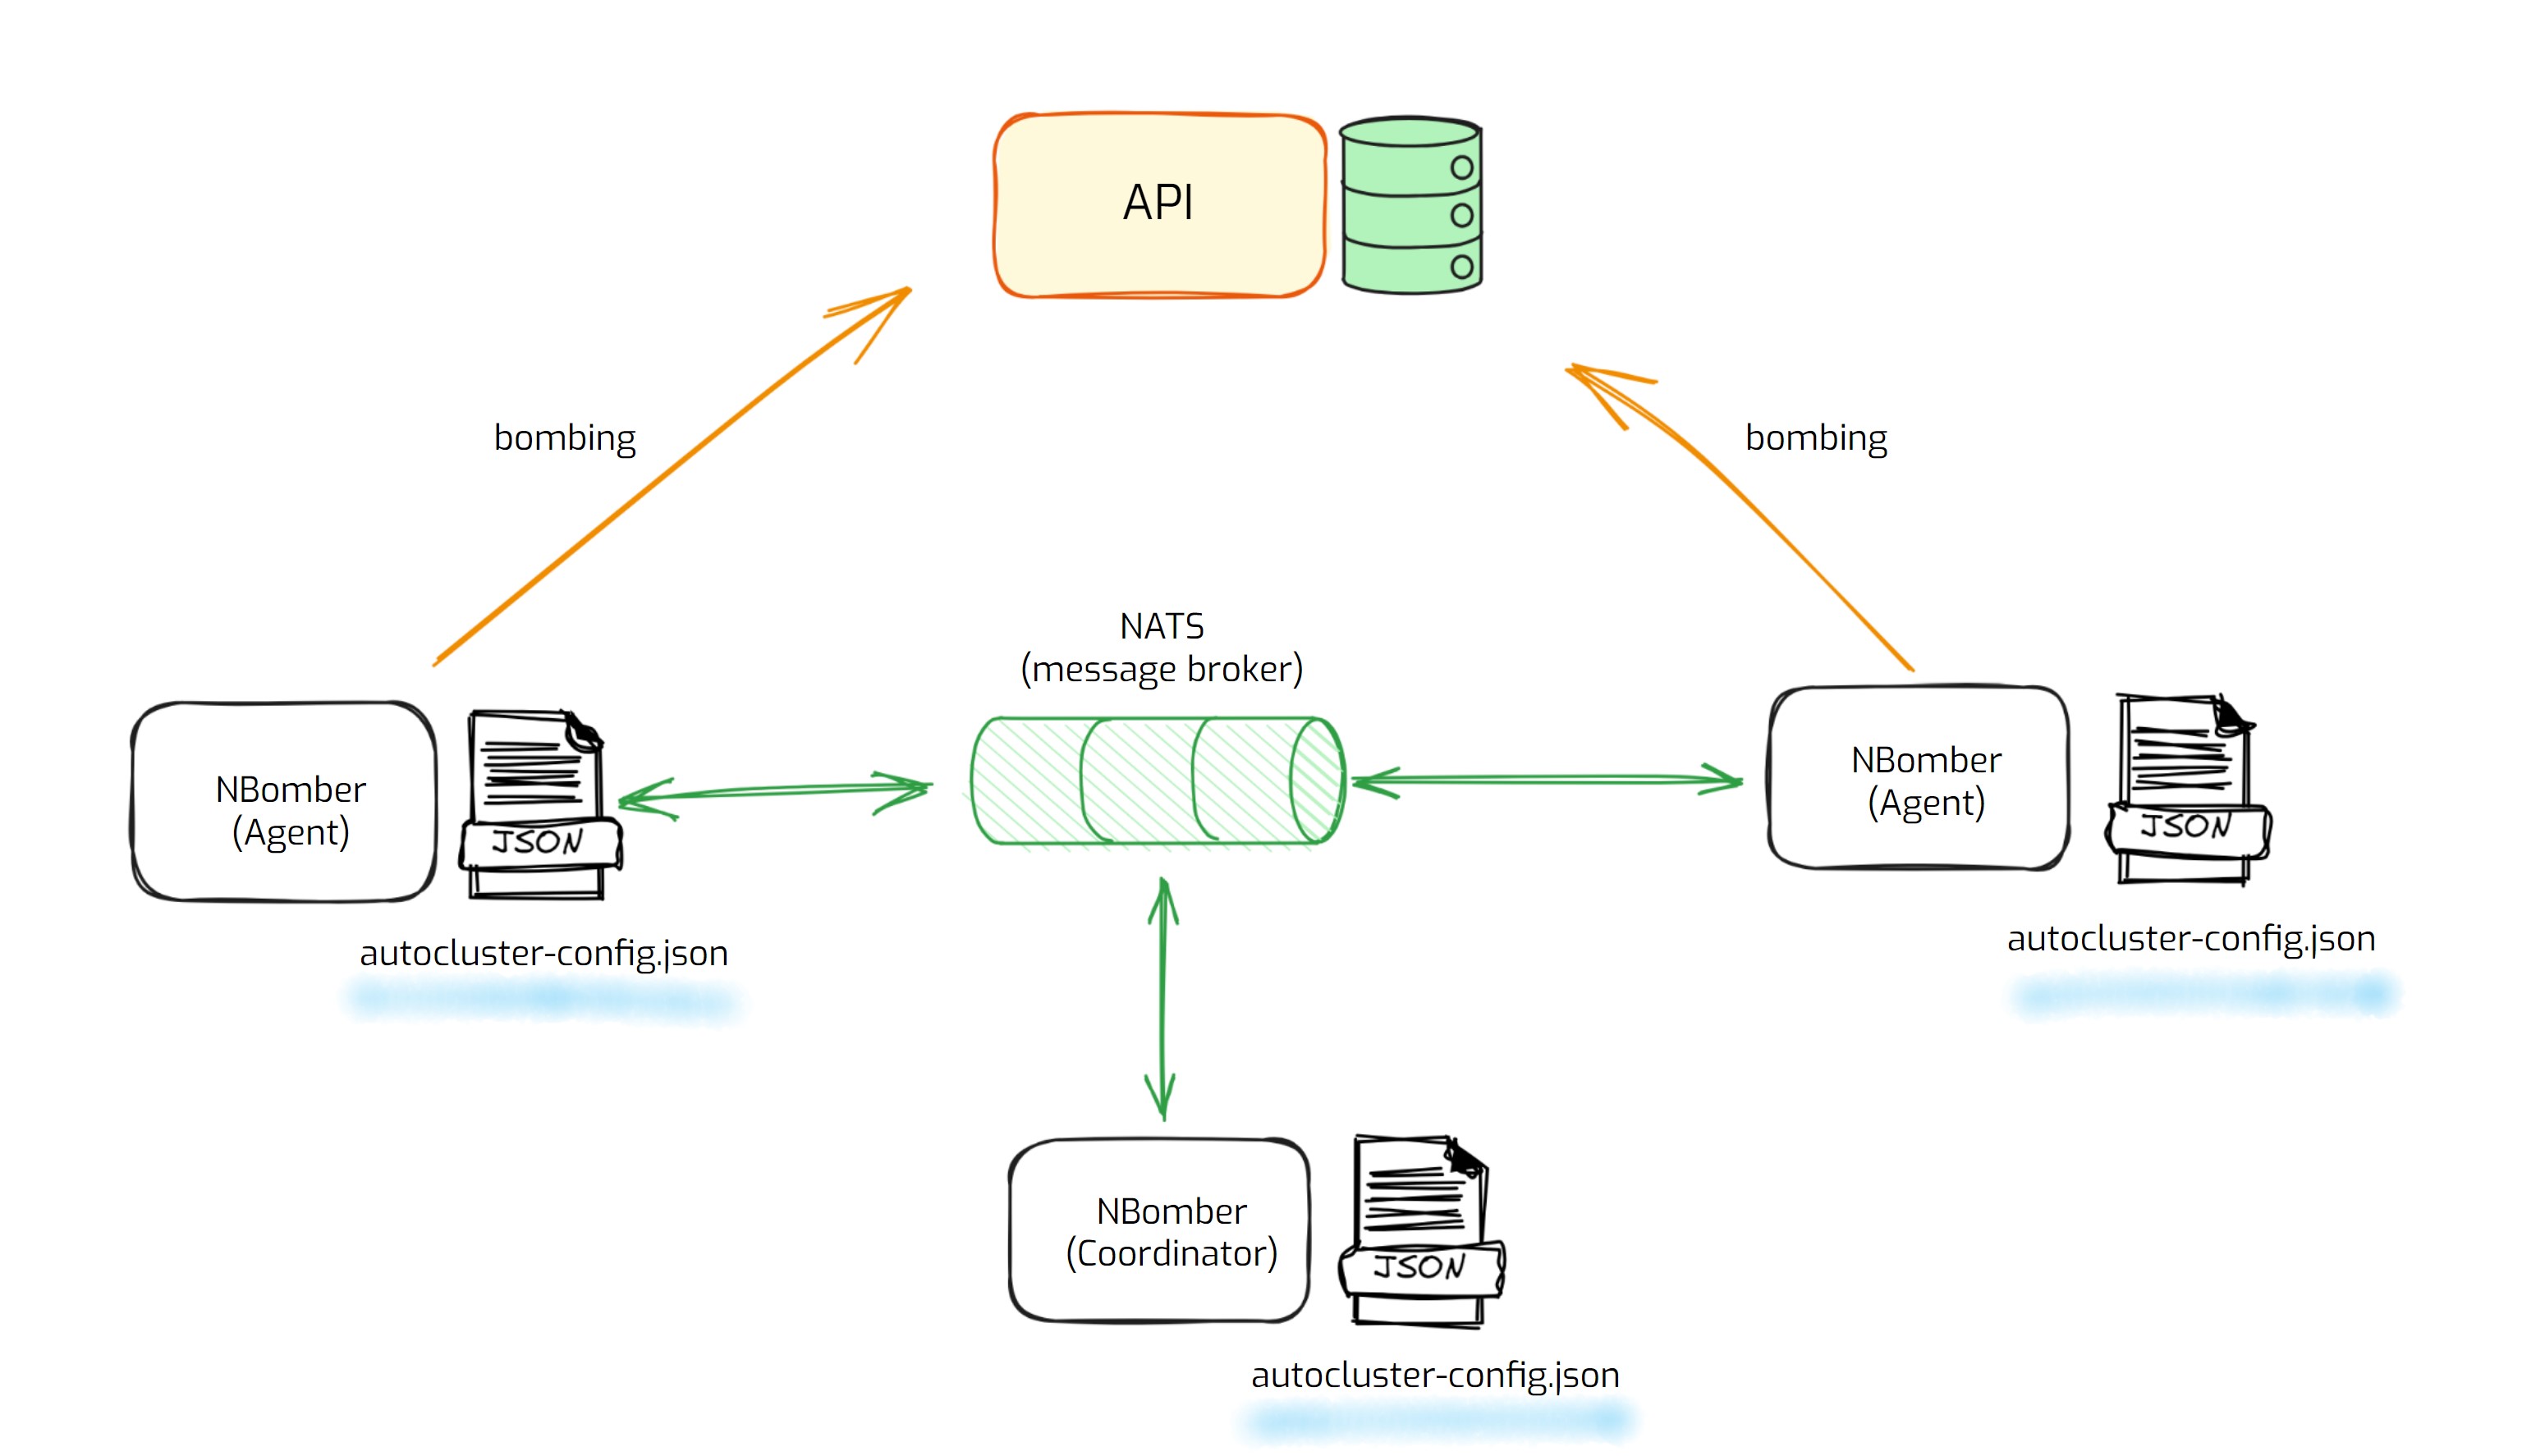
AutoCluster - it's a cluster configuration type that provides an easy way to establish a cluster. With this type of configuration Coordinator will be chosen automatically by leader election.
info
If you are a beginner, starting with AutoCluster is recommended since it is simpler to set up and fits the majority of load tests.
AutoCluster Config
This is a basic example of AutoCluster configuration for a cluster with two nodes (Coordinator + 1 Agent):
autocluster-config.json
{
    "TestSuite": "my test suite",
    "TestName": "my test",

    "ClusterSettings": {

        "AutoCluster": {
            "ClusterId": "test_cluster",
            "NATSServerURL": "nats://localhost",

            "Coordinator": {
                "TargetScenarios": ["test_scenario"]
            },

            "Agent": {
                "TargetScenarios": ["test_scenario"],
                "AgentsCount": 1
            }
        }

    }
}
The main settings are:
ClusterIdis the Id of the NBomber Cluster that will be shared between the NBomber nodes(processes). By this id, NBomber node will be able to discover all participants in the cluster.NATSServerURLis the URL to the NATS host server. In our example, we will use alocalhostsince we host the NATS message broker on the local machine using docker-compose. You can find more info about NATS connection string by this link.TargetScenariosspecifies target scenarios that will be executed in the cluster. You can specify different TargetScenarios for Coordinator and Agents.AgentsCountspecifies the number of Agents that should join the cluster (by ClusterId) to allow Coordinator to start a load test.
This is example of AutoCluster configuration with a ScenariosSettings:
auto-cluster-config.json
{
    "TestSuite": "my test suite",
    "TestName": "my test",

    "ClusterSettings": {

        "AutoCluster": {
            "ClusterId": "test_cluster",
            "NATSServerURL": "nats://localhost",

            "Coordinator": {
                "TargetScenarios": ["test_scenario"]
            },

            "Agent": {
                "TargetScenarios": ["test_scenario"],
                "AgentsCount": 1
            }
        }

    },

    "GlobalSettings": {

        "ScenariosSettings": [
            {
                "ScenarioName": "test_scenario",
                "LoadSimulationsSettings": [{ "Inject": [1, "00:00:01", "00:00:01"] }]
            }
        ],

        "ReportingInterval": "00:00:05"
    }
}
Run Cluster
var scenario = Scenario.Create("test_scenario", async context => { ... });

NBomberRunner
    .RegisterScenarios(scenario)
    .LoadConfig("auto-cluster-config.json")
    .License("YOUR_ENTERPRISE_LICENSE_KEY")
    .Run();
You can find the complete example by this link.
Run via CLI args
MyLoadTest.dll --config="auto-cluster-config.json"
You can also pass other CLI args:
MyLoadTest.dll --config="auto-cluster-config.json" --cluster-agents-count=5 --license=YOUR_LICENSE_KEY
Here, you can find a list of all available CLI arguments.